Understanding HDRMerge
HDRMerge function is very simple in its core. It takes a set of raw images of the same subject, but different levels of exposure. It stacks them into layers, with the most exposed shot at the top. Then, it removes the burnt areas of each layer, revealing the details of the layers underneath it. As a result, you obtain a new raw image, with the most exposed pixels of each original image that are not saturated. It contains as much detail and as less noise as possible. HDRMerge provides tools to control the details of this process.
Usage
HDRMerge has both a graphical and a command line interface. The GUI contains a set of edit tools that allow you to decide what part of each image gets into the final output. This is mainly useful to remove ghosts created by moving objects between images. If there are no such moving objects, the command line interface is intended to be used in batch processing, e.g. from a script. You can start the batch process either by providing an output file name with the “-o” switch, or by generating an automatic one with the “-a” switch. Other switches control the input and output parameters. If neither “-o” nor “-a” is given, the program will show the GUI and load the files given in the command line, if any, but ignoring all other options.
Load the input raw images
When the GUI is invoked, the program will directly present you the Open dialog:
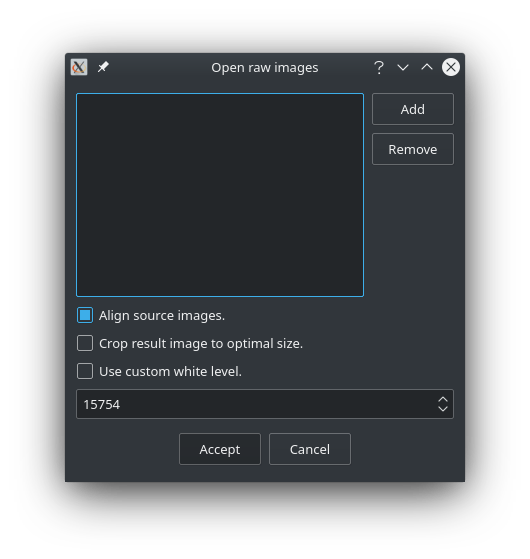
This dialog can also be shown later with the Open command in the File menu.
The Open dialog allows you to select multiple raw images.
It also has two checkboxes to decide whether to apply the MBT alignment algorithm and to crop the resulting image to its optimal size.
The MBT alignment algorithm can correct small misalignments by translation. Given the nature of the color organization in a raw image (only a Bayer matrix is supported by HDRMerge) rotations cannot be compensated and translations must be performed in steps of 2 pixels. However, this should be enough even for steady handheld shots in burst mode. A tripod is highly recommended to obtain the best results, anyway. Once aligned, the program can crop the output image to just the area of the image that is shared by all the input raw files. You can select not to do so, in which case the output image will cover the same area as the least exposed input, to avoid burnt areas of more exposed shots. The main reasons for not aligning and/or cropping the images are:
- Because the alignment algorithm may fail due to lack of detail, e.g. with highly exposed shots or out of focus areas.
- Because the user wants to apply a flat-field correction later. RawTherapee only applies this correction to images that have the same dimensions as the flat-field image.
When you accept a list of input images, the application will show a progress dialog with information of each load step. The process will only succeed if images are compatible. The size, orientation, Bayer pattern and black and white levels must be the same, which mostly means that they have been made with the same camera.
Editing
Once the input images are loaded, the interface presents you with the main window:
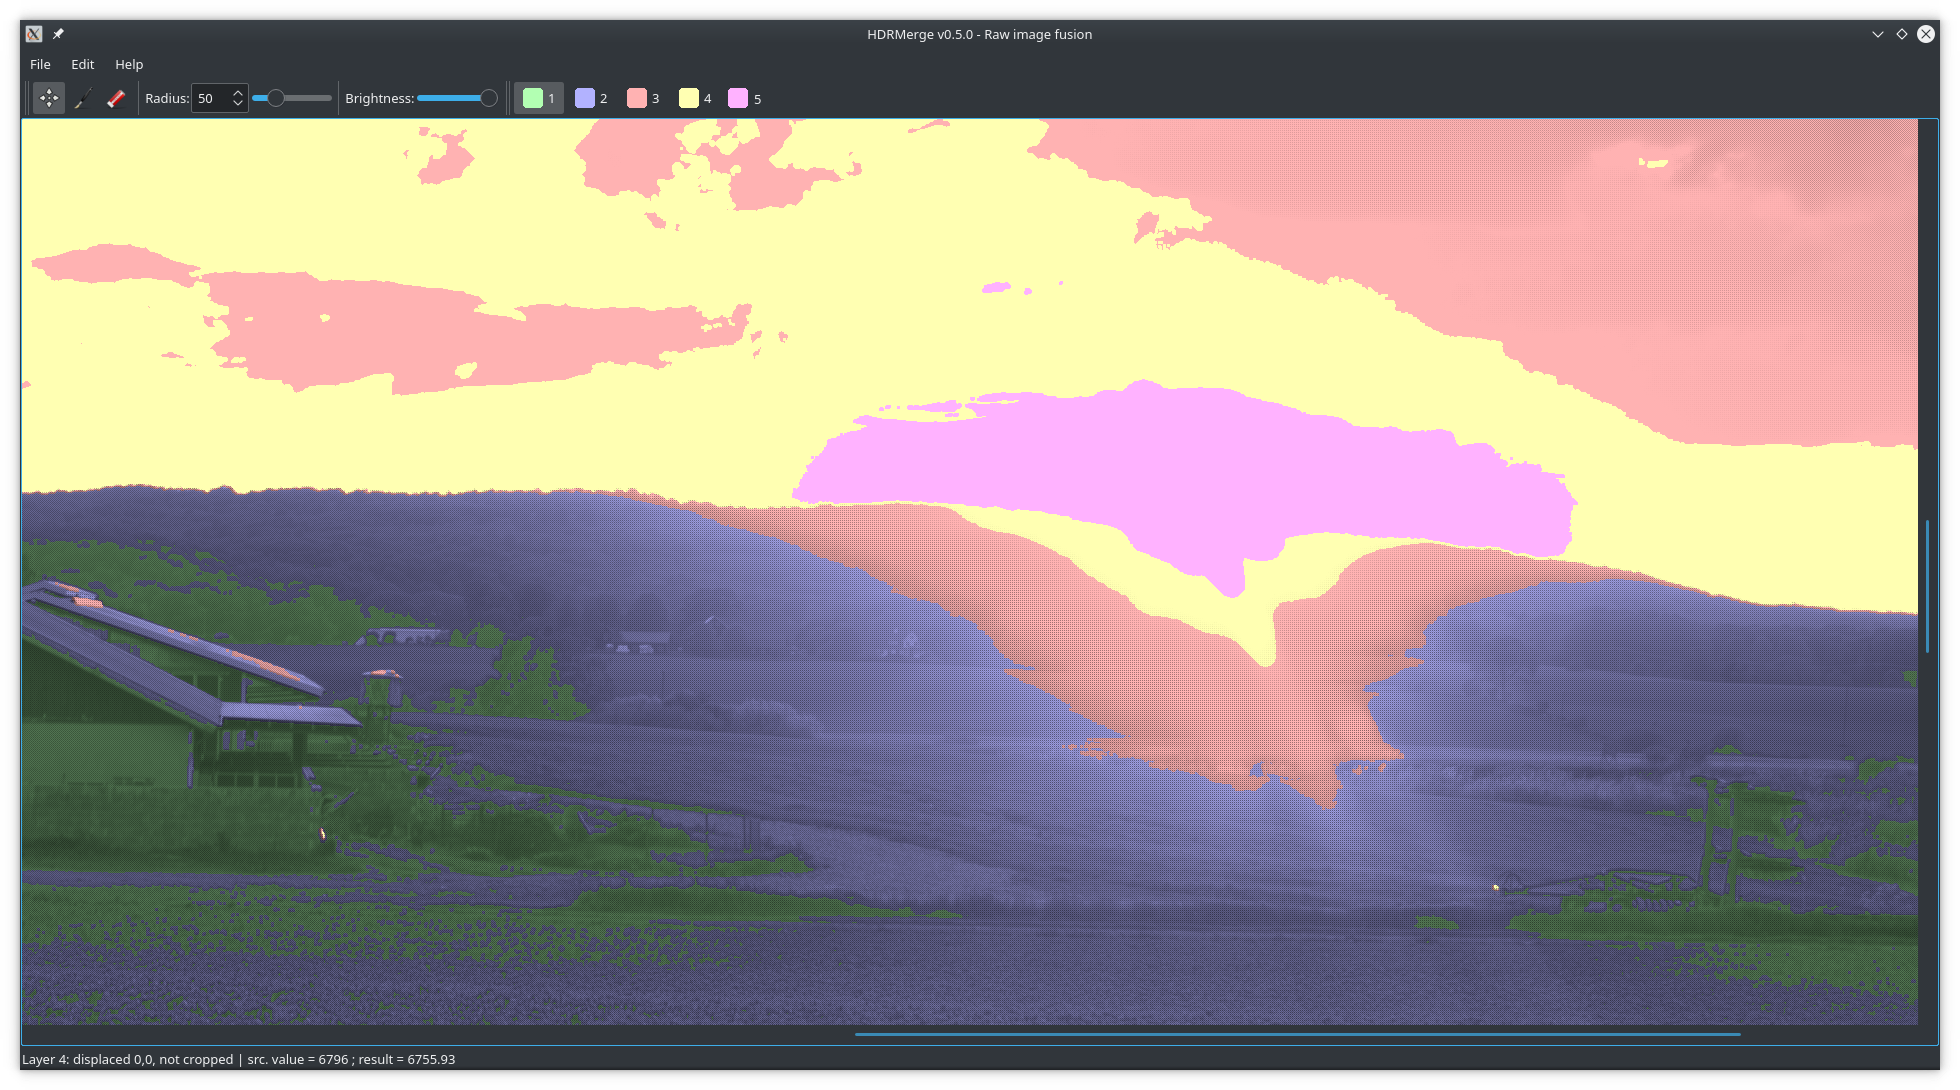
Most of its space is occupied by a 100% preview of the result. There, input images are stacked on top of each other, and you can see the selected pixels from each layer painted with a different color. The set of pixels of each layer that end in the final output is called the merge mask, and HDRMerge’s GUI allows you to modify it. But first, you can then pan the result to inspect it.
The tools to modify the mask are located in the toolbars.
They appear at the top by default, but you can move them to any edge of the main window.
From left to right, the three main tools allows you to pan the preview, add pixels to the current layer, and remove pixels from it.
You can quickly change to the add and remove tools by holding down the Shift and Control keys, respectively.
When you release the key, the last tool in use will be selected again.
Then, a slider controls the radius of the editing brush.
A big radius is useful to wipe large areas, and a small radius can be used for the details.
You can also change the size of the brush using the mouse wheel and pressing the Alt key at the same time.
A second slider controls the brightness of the preview, for better visualization of the shadow areas.
This brightness does not affect the output, just the preview in the GUI.
In a second toolbar, there is a button associated with each layer, starting from the top layer (most exposed shot). You can select the layer that you want to edit with these buttons. The last layer cannot be modified, there is no sense in removing or adding pixels to it. Beware that, since the pixels of the most exposed image are used in the shadow areas, they appear the darkest. To avoid this confusion, if you hover the mouse pointer over each button, a tooltip will show you the exposures steps of that image relative to the least exposed shot. Each button contains the layer number and the color associated with it. You can also select a layer by pressing its number in the keyboard.
When some objects were moving while you took the shots, there will appear “ghosts”.
You can use the edit tools to add or remove pixels from each image but the last one, until all the pixels that belong to a moving object only come from one of the input images.
To make your job more precise, you will notice that you can only remove pixels that are visible (not covered by a higher layer) and add pixels over the next layer in the stack.
Usually, you will want to only remove pixels, starting at the first layer and then going down.
Adding too many pixels to a layer may result in burned areas appearing in the result image, so be careful.
On the other hand, the pixels of the first layers contain less noise in the shadows.
These operations can be undone and redone with the actions of the Edit menu, or by pressing Ctrl+Z and Ctrl+Shift+Z, respectively.
Save the result
Once you are satisfied with the preview, the Save HDR command of the File menu generates the output DNG file.
It will first ask you for a file name, and then it will present the Save dialog:
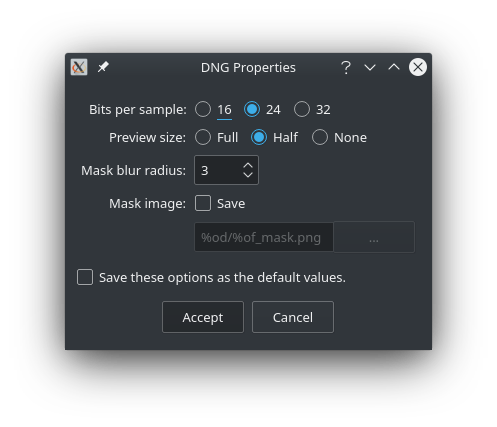
You can first select the number of bits per sample (16, 24 or 32). The number of bits per sample has an important impact in the output file size. As a rule of thumb, the default value of 16 bits will be enough most of the time. Empirical tests (thanks to DrSlony) show no apparent difference between 16- and 32-bit images, after merging 5 exposures with 2EV steps, despite strong manipulation of shadows/mid-tones/highlights. Nevertheless, if you see some unexpected noise in the shadows of the output image, you can try a 24-bit output. 32 bits will almost never be necessary, but it can be selected anyway. Then, you can also select the size of the embedded preview (full, half or no preview). To avoid hard transitions in certain rare situations, HDRMerge applies a blur filter to the mask. The default value of 3 pixels is enough most of the time, but in some rare occasions you may need to increment it. Finally, you can select whether to save an image with the mask that was used to merge the input files.
The command line interface
You can also run HDRMerge without GUI. With the command line switches, you can control all the process described before, except for the edition tools. In this way, HDR images can be created with very little interaction.
The main arguments of the batch mode is a list of raw files to be loaded, and an output switch.
The -o file switch specifies that file will be the name of the output file.
Since version 0.4.5, this name can contain certain tokens that will be replaced by parts of the input file names:
%if[n]is replaced by the base file name of image n. Image file names are first sorted in lexicographical order. Besides, n = -1 is the last image, n = -2 is the previous to the last image, and so on.%iF[n]is replaced by the base file name of image n without the extension.%id[n]is replaced by the directory name of image n.%in[n]is replaced by the numerical suffix of image n, if it exists. For instance, in IMG_1234.CR2, the numerical suffix would be 1234.- Finally,
%%is replaced by a single%.
The -a switch is the same as -o %id[-1]/%iF[0]-%in[-1].dng.
The rest of the switches control other details of the process:
- The MTB alignment and crop algorithms are enabled by default, and can be disabled with the switches
--no-alignand--no-crop, respectively. - The
-b bpsswitch selects the output bits per sample. The allowed values are 16, 24 and 32. - The
-p sizeswitch selects the size of the embedded preview. The allowed values are full, half and none. - The
-m maskswitch selects the name of the mask file, if you want to save it. It accepts the same tokens as the-oswitch, plus:%ofis replaced by the base file name of the output file.%odis replaced by the output directory.
The command line interface also offers a powerful functionality since version 0.4.5: the batch mode.
With the -B switch, HDRMerge will take a long list of input files and group them into exposure sets.
The grouping is done based on the time interval between shots.
Shots that are no more than 3 seconds apart will be considered part of the same set.
This time gap is more than enough for shots taken in burst mode, but it can be changed with switch -g gap for shots taken manually.
You can also control the level of verbosity of the program with the -v and -vv switches.
The -v switch shows progress information, and the -vv switch also shows debug information.
Finally, the --help switch presents a short guide to the command line interface.